Home
Home

 Creators
 Search
 Recent
 Random
 Posts
Posts
 DMs
DMs
 Tags
Tags
 Random
 Importer
 Import
 FAQ
FAQ
 Account
 Register
 Login
Login
 Favorites
 Keys
Keys
 Logout

Tutorial on 3D Backgrounds! (Patreon)
Content
Upon request, I decided to post a tutorial on how to install and use the 3D modeling program I use, called Sketch up! Whether you want to use it to add a background to your drawings or whether you’re trying to make your own Webtoon, having a 3D software at hand can save you countless amount of hours and stress 😋. So let’s get right into it~!
—> Note that this guide will be very detailed so you can always just skip to the parts that interest you!
BEFORE you download:
Sketch up is available in many versions. Some of them require a license you need to pay for and others are completely free.
The main idea here is how you plan to use the program. If you want to use it for a small or personal project it’s perfectly acceptable to use the free versions available. However, naturally, if you intend to use it for a project you’ll profit from you’ll have to pay the license.
So before you download or use Sketch Up, if you want to be on the safe side, question in which category your project belongs to.
Downloading Sketch up:
- For personal use:
In this case, you don’t have to pay the licence and you can use Sketch up for free.
Free versions include a Web only version (not downloadable) but note that this version DOES NOT grant you any access to Sketch Up’s 3D Warehouse so for me, that’s a huge drawback.
Best option: Download Sketch Up Make 2017, which is the only free downloadable version of the program for personal use. (Bonus: it has access to the 3D warehouse!)
So simply create a trimble account and download it from the official site here:
Link: https://www.sketchup.com/download/all#
- For professional projects, where money is involved:
In this case, you should buy the licence if you don’t want to risk getting into legal troubles in the future.
The license you can buy is either for Web only or Web and Dekstop (downloadable app). With all of these licenses you get unlimited access to Sketch up’s warehouse where you can download countless pre-built 3D models.
Note that there’s not an option to buy the product once and for all but you have to buy a yearly subscription. (it comes with a 30 days free trial)
You can buy this from Sketch up’s main site by clicking “buy sketch up”
~~~~~~
AFTER you download:
Well, first of all. Good job friends! You have officially unlocked: ✨Sketch up✨

So now, it’s finally time to get to work~!
Sketch Up: The basics:
When you first open Sketch up you’ll be met with a workspace that looks like this:

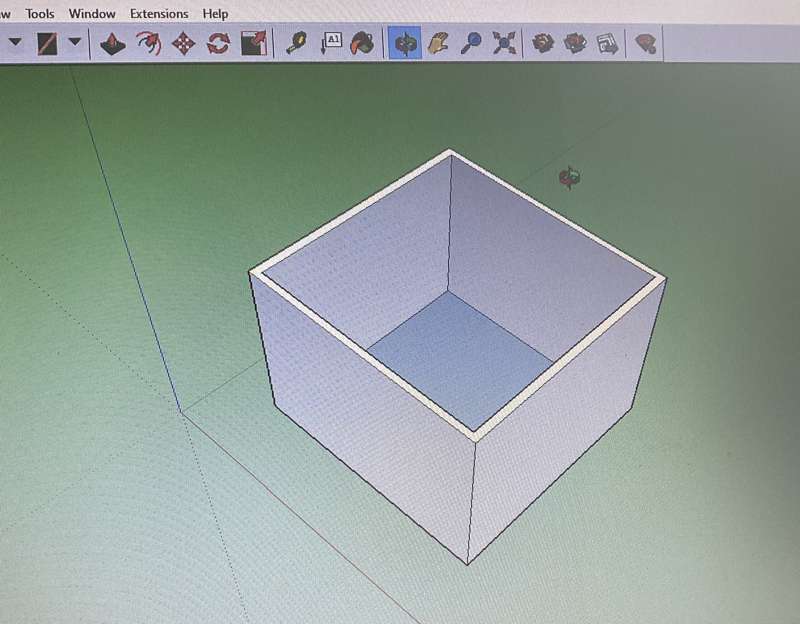
So let’s see what some of the basic tools do!


Example of using the “shapes” tool to create a room in seconds!:


Downloading 3D models:
As you can probably tell by now, creating your own background from scratch can be very tiresome and time consuming. That’s why what most artist do, myself included, is downloading already existing 3d models available online, altering them accordingly and implementing them in their Webtoon!
What you need to do is go to “Sketch Up 3D Warehouse”. This library is filled with buildings, objects, rooms etc! And the best part is that you can download them all for free!
So if you, for example, wanted to download this room, here’s how to download and import it to Sketch up! :
- For Sketch up 2019 to 2022 (Sketch up pro with license)

You simply download the Model according to the version of Sketch up you own. After downloading it you can either open it directly by clicking at it from your files (This will open a new file with your model on it) or you can import it in the file you’re already working on by going to: File>Import (and find your model).
- For Sketch up Make 2017 (or older versions?)
You need to download the “Collada” file. This will download your object as a zip file. Extract your file in a separate folder and inside the new folder should be a “dae“ file.


Import the file to Skup by going to File>Import, go to the new file in which you extracted the zip and click on the “dae” file.
After the Import is completed, you’re done!

Render and Export Backgrounds!:
After you’ve finished with any adjustments on your model and found the right perspective for you background image it’s time to export it and insert it to your drawing application!
The way you export an image is by going to File> Export> 2D graphics as is shown in the picture below

To get better quality on your background images click at “options” next to the export button, and you can change the settings to match the ones I have set:

The image will be saved on the place you have set on your pc and then all you have to do is move it to the app you’re using for drawing and you’re done! 😎
Transfer and insert images to a drawing app:
Since Sketch up is in my Pc and I’m making my Webtoon on my iPad, I transfer the images through google drive so the quality isn’t affected.
After that, I import the images, place them accordingly, add various effects/ lights/ blur etc. and I’m done!
—
I hope you managed to get an idea on how to handle Sketch up and export your background images from this tutorial!
If you have any other questions don’t hesitate to ask me!
Best of luck to you, and happy modeling! 😜❤️
Files
Previews only